


eSIM Installation Error on iPhone: How to Verify and Activate Your eSIM Step by Step
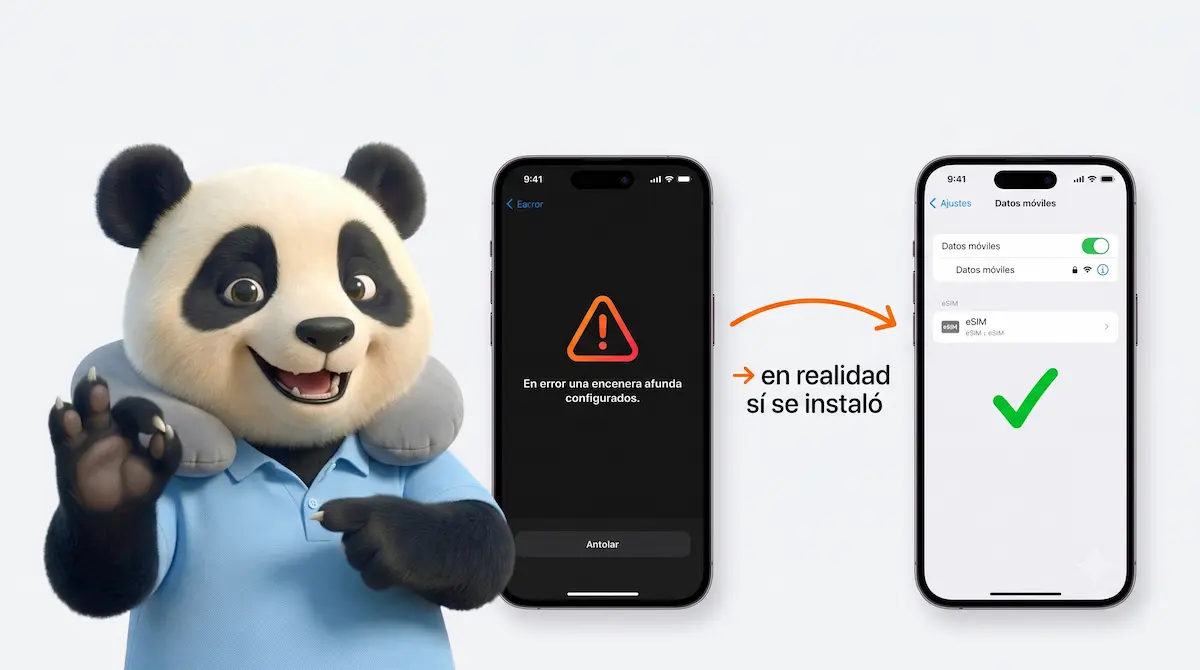
If you installed your Gigapanda eSIM on an iPhone and saw an error message at the end of the process — breathe easy. Your eSIM most likely installed correctly.
This is a known issue in recent versions of iOS: during installation, the system tries to activate the eSIM automatically and fails at that step. iOS shows you an error, but the eSIM is already saved on your phone. The activation step simply happens later, when you arrive at your destination.
⚠️ The most important thing before you continue
If you already see the iOS error, do NOT scan the QR code again. If you do, you’ll get the message “This eSIM can no longer be installed” and the QR will be locked. First check whether the eSIM is already installed by following the steps below.
Why does this happen?
On recent iOS versions, the eSIM setup assistant tries to activate it at install time. To activate the eSIM, it needs to connect to the carrier network at your destination — but if you’re still in your home country, that network isn’t available. The result: iOS shows an activation error even though the installation was successful.
The installation QR and the eSIM activation are two different things. The QR only downloads the eSIM profile to your phone. Activation (connecting to the network) happens at your destination.
Step 1 — Check that the eSIM really is installed
Before doing anything else, confirm the profile is already on your iPhone:
Open Settings
Tap Mobile Data (Cellular)
Look for the SIMs section — you should see your main line (Primary) and, below it, the new eSIM
Your Gigapanda eSIM may appear under the name you gave it during installation, or under the network operator’s name: Drei, KPN or CMHK
See it there? Perfect — the eSIM is installed correctly. The error iOS showed you has no real effect. You can ignore it.
Don’t see it? Then there was a real problem with the installation. Message us on the Gigapanda chat and we’ll send you a new QR.
Step 2 — Activate the eSIM when you reach your destination
Activation happens once you’re in the country you’re traveling to. Your plan days start counting from this point, not from installation — so don’t lose days by activating it before your trip.
Go to Settings → Mobile Data
Tap the Gigapanda eSIM (Drei / KPN / CMHK)
Flip the “Turn On This Line” switch — it should turn green
On that same screen, turn on “Data Roaming” — also green
Go back to Settings → Mobile Data and tap “Mobile Data” at the top
Select the Gigapanda eSIM as your active line for data
Within a few seconds, the local carrier’s name should appear in the top bar of your iPhone. Done — you’re connected!
Step 3 — If there’s no signal after activating
In some cases the signal takes a few minutes to appear after you activate the eSIM. If it still hasn’t connected after 2–3 minutes:
Turn on Airplane Mode for 30 seconds, then turn it off
If it still won’t connect, restart your phone
Check that the APN is configured correctly — you’ll find it in your purchase confirmation email
If there’s still no connection after these steps, message us on the chat and we’ll help you.
Quick recap
Situation What to do
iOS showed an error at the end of the installation Check Settings → Mobile Data → SIMs to see if the eSIM is listed
The eSIM IS on the list Ignore the error. Activate at your destination (Step 2)
The eSIM is NOT on the list Contact support to get a new QR
It says “This eSIM can no longer be installed” The QR was already scanned — check whether the eSIM is in the SIMs list
No signal after activating Airplane Mode 30 sec → restart → check the APN
Still have questions? The Gigapanda chat is available at any time to guide you step by step.

